
Of pipes, cables and concrete
10th February 2019
No apologies for starting with yet another view of RS8 from the adjacent landing - as it gradually returns to its former glory.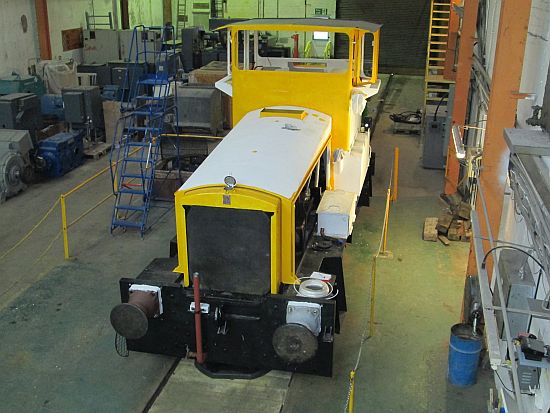
Monday of course meant the familiar roads up to Tunstead, and a day on RS8. We're on to the final things now before getting the loco operational.
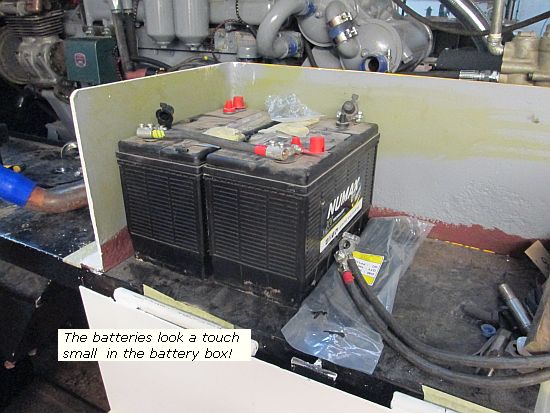
The batteries were placed in the battery box (though they do look rather undersized, taking up less than half the volume of the 'box: in truth they are smaller than I would have liked, but sixty years ago the cells would have probably been in 6Volt blocks and mounted in wooden casings so taking up much more volume ampere/hour for ampere/hour) and the cables made off and crimped ready to connect up.
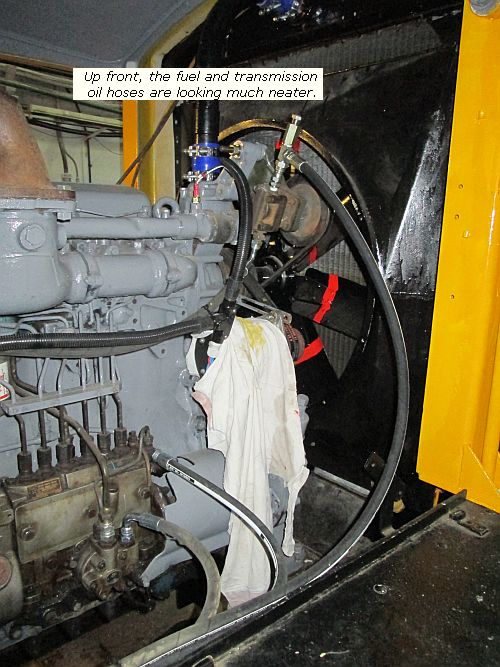
The final hoses were made to connect fuel tank to the engine in both directions, and the feed from converter suction filter to the pump. I added a tee piece and a plug so that we can prime this readily when the time comes, and the delivery hose from pump to converter inlet was shortened and the end re-made and looks much neater for it. Pete C fitted the suction filter and then he and Andy filled the converter reservoir, some of which filled the filter and probably much of the feed line to the charge pump.
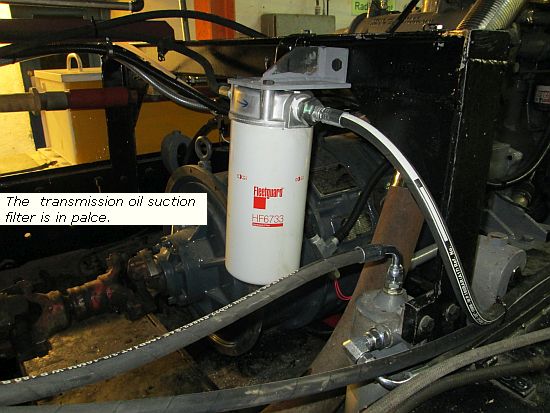
Andy disappeared underneath and gave the axleboxes a second dose of oil, while Pete C filled the rear section of the converter (the unusual bit) with engine oil to dipstick level. The only real setback of all this was the cooling system, which Pete C started to fill with water only for a severe leak to develop. At first I thought this was a drain nipple just rear of the oil cooler, but with better light we realised that the braized joint between the two copper pipes had failed and water was flowing round the pipe and draining off the suspected nipple. The pipe was removed for rectification
As far as oils go, only the grearbox remains dry - and the oil for that is on order but not yet arrived - and the converter itself is probably empty. Normally I would allow the charge pump to fill this - you fire up the engine, keep topping up the reservoir and wait until the level stops falling and pressure registers on the gauge in the desk (or oil leaks from whatever joint isn't tight, whichever occurs first) - but Andy insists on filling the converter the hard way, via one of the bleed lines, but that is for the next working day. Back up in the cab, it was incumbent on me to get the control pneumatics somewhere near ready, if not beautiful.
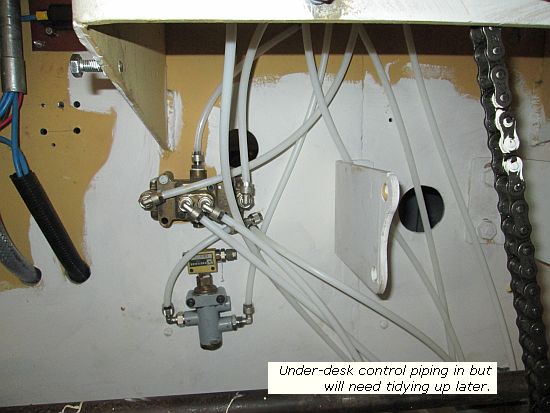
The clutch unload valve was relocated by Andy, while I plumbed up the emergency pressure gauge and the brake cylinder guage line and marked it and the main air connection. The remaining desk valves were connected up as were the pipes to the gearbox and standstill detector, though the latter will do for now, I think rubber hoses properly routed up to the cab floor and then into plastic pipe will be more appropriate in due course. And apart from a bit of painting and a general tidy-up, that was about all that was achieved for the week, though even this takes us closer to start-up day.
Before I left I did some measuring up with regards to the throttle linkage. RS8's original throttle linakge employed mechanical rods, though little of it remained by the time we acquired it, it must have been somewhat similar to that fitted to the contemporary Sentinel chain drive four-wheeler. But where it passed through the cab bulkhead was roughly where the converter oil reservoir now resides, and the relay bracket fitted to the engine did not fit the relacement C6NFL now at RS8's heart. So a push-pull cable is now the plan, though it will not neccessarily stop us operating the loco before it is fitted - Pete C keeps muttering about 'bits of string'. There are no remains of the lever that drove the old throttle linkage, so part of my measuring was so as to create a drawing and work it all out. Over the next couple of days I drew up both this throttle linkage and the air cleaner arrangement, and hopefully with a couple of bits to check this is now to be put in hand. Indeed, parts to make up the throttle lever were put on order with my profilers by Thursday, so only the proprietory bit in the middle (and a bracket to anchor the far end) should be neccessary. The air cleaner meanwhile had taxed my ingenuity. It was agreed that it should make minimal external change to the loco - that means no mushroom pre-cleaner sticking out the top - and ideally the smooth lines of the side casing pieces (most missing but obvious from old photos) shouldn't be marred by projections. That means mounting the element inboard of the casing 'line' whilst allowing air to reach it and preventing rain doing the same, yet position the element accessible so that it can be changed in due course. Keeping the fabrication(s) simple help keep it cheap - and I think in the end I've come up with something that will do the job, but I need to make some checks tomorrow before proceeding.
Some weeks ago you saw the formwork and reinforcement appear for a concrete apron outside the shed. At the moment, our dear trusty forklift cannot venture outside. Apart from the slot drain the ground is not hard enough to take its weight - we've tried. Eventually we want to be able to bring the forklift out so that we can load/unload lorries or tip heavier lumps into the scrap bin, but for now the first stage is between the shed and the container. On Thursday we dragged the locos and stock back out the way and a large lorry arrived.
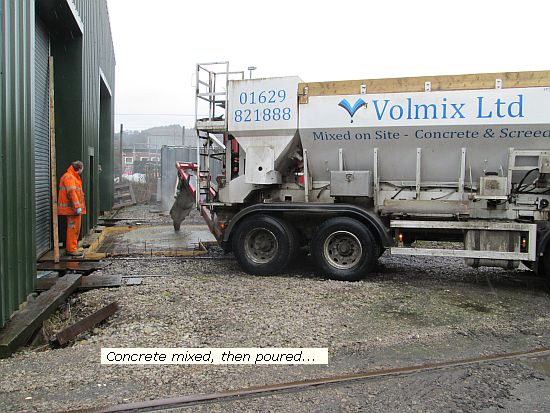
When we laid the floor of the shed, we used ready-mix, i.e. the concrete was mixed at a batching plant, put into a rotating drum on the lorry which kept mixing it to prevent it setting until it had driven over to us and tipped its contents. The alternative approach is to use a vehicle that mixes and tips it in one go on site. A bit more expensive, but you only pay what you need - if you order 5 cubic metres of ready-mix, you have to take it even if you end up looking for 'holes to fill' with the excess. With on-site, if, as in our case, the estimate was 2.5 to 3 cubic metres, they would produce enough to fill the formwork and charge us for that exact quantity. And it was remarkably quick. He backed up over the planned fill, fitted a deflector plate to the end of the conveyor, turned appropriate knobs and handles and the machine promptly delivered mixed concrete which duly spread over our formwork.
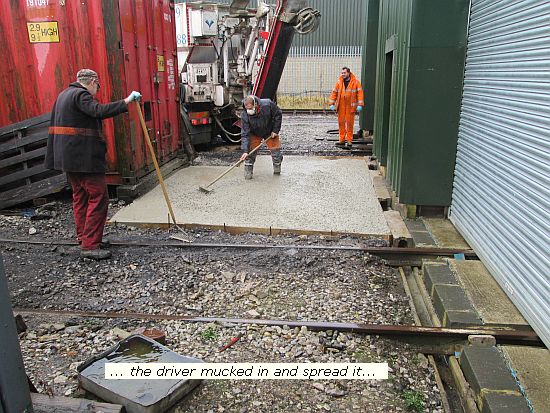
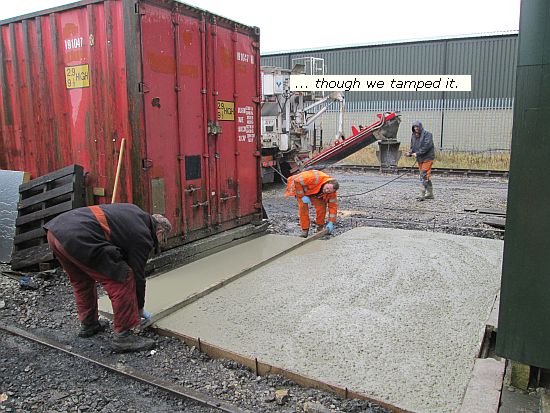
In fact, as he was the only one of us in possession of wellies, he mucked in and raked it around to fill the area, leaving us to tamp it while he washed the delivery parts and departed. By the time Steph was down with some lunch, he'd gone and we were admiring the finished result and wondering just how many pock-marks the rain would leave in the surface finish.
Before scooting off Andrew did some rearrangements within the shed so that we could get better access to the power unit with its defective Hatz, and brought the replacement Hatz nearer in the hope of getting the two swapped. Andy H and I continued after he'd left, removing the old Hatz and trying to release the new Hatz from its mounts, but thwarted by two bolts which are sufficiently inaccessible to prevent attacking with sockets or grinder, and tough enough to resist the ubiquitous cold chisel.
Andrew's present domestic arrangements meant that he wasn't around this weekend, though I spent some time there on both days and so became first man to walk on the concrete. I've removed some of the plywood formwork, but not all. In anticipation of the remaining work on RS8, one item on my list was to find a suitable capacity reservoir. Andrew pointed out that there was on under one of the workbenches, but it was somewhat larger than I had in mind, having been brought up with those made by Thomas Hills for the purpose, that is, to provide a volume to form a timing chamber after which the clutch cylinder is 'unloaded'. Then in an instant I remembered that several pneumatics manufacturers made reservoirs by assembling parts from cylinders. RS8's old clutch cylinder was sat on a recycling pile, so I stripped it down, discarded the piston and its rod, tapped the rod aperture to 3/8 BSP and plugged it. The 4 external studs had become damaged with age and dis-assembly (I'd even had to press one out) so the ends were cleaned out on the pillar drill, the studs sorted with a 5/16BSF die nut and some new nuts found, and cleaned and reassembled it is just the right sort of volume and somehow fitting that it should be re-employed on RS8.
So that's it for another weekly report. Back to Tunstead tomorrow and it may be that we'll be setting the date for the start up (we need fume extraction equipment which is being organised) and perhaps even good news about the cab glazing. Come back next week to see how it goes. See ya then?