
Of clutches and watertight-ness
17th February 2019
Good evening, good morning or whatever time it is as you read this. Welcome to another instalment of Weekend Rails.
And as usual the blog starts with Monday, and the sojourn to Tunstead. The three of us (Pete C, Andy H and myself) are getting nearer to start-up day, and Pete C brought down the blower that will act as fume-remover (with some ducting, obviously).
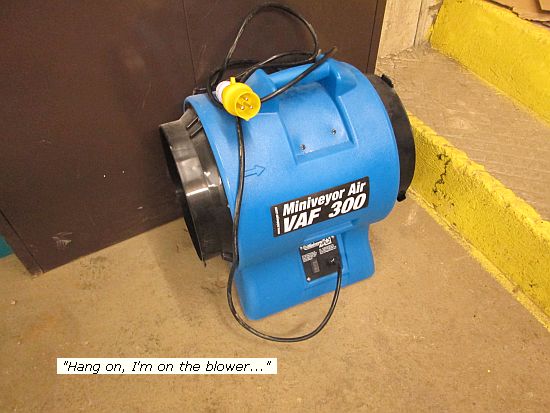
Although it is brand new (bought for another project and then not required) and has just been PAT-tested, Pete C decided to plug it in and check it works. Did it? Sure - we ran it for a few seconds during which it blew a picture off the notice board 15 feet away. Andy H cracked on with filling the converter circuit with thin hydraulic oil through a 3/8 diameter line - it'll save time filling when it finally runs up. I set Pete C on sorting the collars on the brake crossbeams. I had had new ones made (we'd had to cut some of the originals) and they had a hole in the middle of the collar but wouldn't line up with the holes in the ends of the crossbeams. It kept Pete occupied for a large part of the day and we came to the conclusion that originally they had been drilled in situ and hence no two had been the same. He got most of them sorted and left me to hunt out a few new split pins for this week. Andy H and he in between times returned to the cooling system. Andy had confided in me that he wasn't sure whether his repair to the coolant pipe was adequate, so just in case he'd brought blow-lamp, plumbers' solder and flux and would disappear off site to a nearby lay-by to carry out rectification. Sadly the pipe still leaked, but Pete C insisted on issuing a hot-work permit and in due course the pipe was made watertight. That meant that the converter, extended section of the converter and the cooling system were all filled and ready, leaving just fuel and gearbox to go. Andy went underneath and checked the axleboxes again, then greased the labyrinth seals on the gearbox, and any other grease nipple he came across, like the side rod bearings. (The RF25 gearbox, like the RF11, doesn't have rubber lip-seals as you might expect. The bearing caps have machined grooves which are filled with grease from 3 or 4 grease nipples on the circumference. The grease holds the oil in.) And what was I doing in all this? I was esconced in the cab, trying to finish off the control pneumatics. First task was to mount the ex-cylinder, now timing reservoir, which I did by commandeering a bracket installed originally as part of the vac pipe system and drilling it to fit the cylinder on the extended studs. I mounted the flow restrictor directly to this for quickness and simplicity.
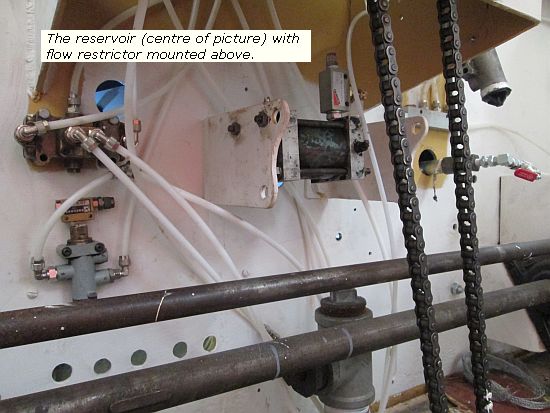
This though is a bi-directional restrictor. It ought to be uni-directional, but I had it in stock and hadn't thought more about it. As I began quickly piping it up, I was thinking through the operation and whether it would make that much difference. A bi-directional restrictor restricts air in both directions. The idea of it and the timing reservoir is that when pressure appears, it passes slowly through the restrictor into the reservoir and eventually creates sufficient pressure to operate the valve further on. On this system it then holds that valve open until pressure is removed, whereupon it vents back down. Aah, I suddenly thought but whereas with full main air pressure charging it up will take 6 seconds or so (before unloading the clutch cylinder), when it vented the falling pressure in the reservoir will take longer to empty as it falls away to nothing. In practice the driver wil have changed direction and brought the clutch back in before then, so not getting the full 6 seconds timing on any subsequent operation. A uni-directional restrictor on the other hand, restricts in one direction but in the other has a simple check valve, so emptying the reservoir is almost instantaneous. And as I thought this through, I realised not only would the bi-directional restrictor not do at all, but that I had drawn the circuit with the feed to restrictor and reservoir in the wrong place. At least with plastic piping it didn't take long to rectify that, but the restrictor needs to be changed.
Part of the final connecting up included putting the instrument panel into place. Even that threw up a snag, because as I now had the plastic pipes onto the duplex air gauge ports, I found that the pipes snag the cab front. But the electical plugs, the ammeter and the keyswitch were all in position, so I hooked up the batteries (doing the final 'dab test' of lug to battery terminal to see if any sparks appeared!) and with some trepidation turned on the battery master switch. At this moment the only fuse in position was the 50amp one in Alternator +ve, the other control and lighting circuits go through automotive spade type terminals in a proprietory fuse box which carries built-in LEDs arranged to light up if there's a circuit but a defective fuse in place. So two of these promptly lit up, together with two LEDs in the instrument panel. These latter two both showed a dim green, which was slightly disappointing as they should have shown red, but as the terminals aren't marked it was 50/50 which way round I'd wired them. I swopped the connections over, put in some proper fuses and here are the first signs of life in RS8 in many a year.
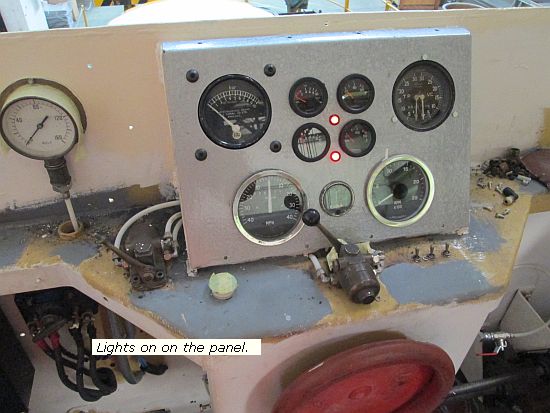
Emboldened by this (and remember that the Start circuit fuse is out so it cannot crank yet) I tried the keyswitch in the hope of getting the Run solenoid to engage. It didn't. I glanced at the diagram and realised it wouldn't unless the timer operated, and this needed the clutch to be 'out' whereas it was 'in' (we need to set up the limit switch that way round). So Andy held the switch over manually and I tried again. And it would be nice to say proudly that the Run solenoid jumped over, but I can't because it didn't. So checking through for any wiring defects is priority this Monday.
On Tuesday I was on my way to a customer when the phone rang and Pete C was on with some excellent news. All the heavy plant at Tunstead nowadays is by Cat, and in consequence the 'garage' that looks after them has been taken over by Finnings, their UK dealers. A few weeks ago at my instigation Pete C sounded the garage out about sponsoring RS8's glazing. There are 14 windows on RS8, from the two big'uns front and rear, through 4 up each side, and 4 in the cab and protective sheet ends. The garage passed the enquiry back to Finnings office in Cannock, and the news had come through that yes, Finnings will sponsor the glazing, at a price of well over £1k it is a very generous and welcome contribution. The window surrounds have already been painted both inside and out (now you know why) and all being well it should be glazed during this next week.
I had checked my dimensions on the air cleaner assembly during Monday, so those drawings were tweaked a little and then released to my favourite fabricators for manufacture. I also tried to order a throttle cable, but the supplier, which I have used before, has been remarkably disappointing in its lack of action so that is still not ready.
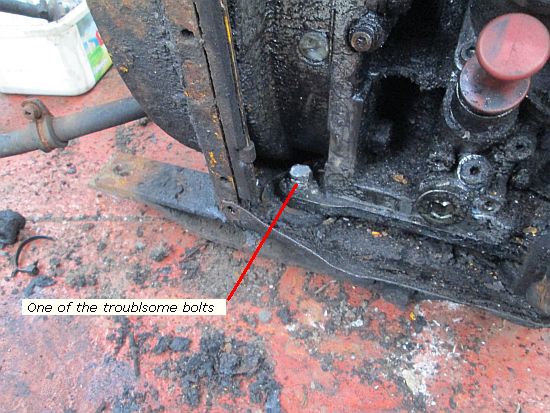
One of the nice sidelines of this blog is when readers offer help and advice. So it was that after reading our trials with inaccessible bolt heads on the Hatz, reader David S offered to drop in with his new 'toy', an induction heater he'd got for Christmas. He was still learning its capabilities, he stressed, but worth a try before resorting to oxy. The you-tube demo showed an apparently quite large nut being heated to red-hot in 30 seconds or so simply by holding the device, and its coil of wire resembling a well-furred kettle element, against the adjacent metal and squeezing the trigger. So down came David Wednesday afternoon and here he is, applying the heat.
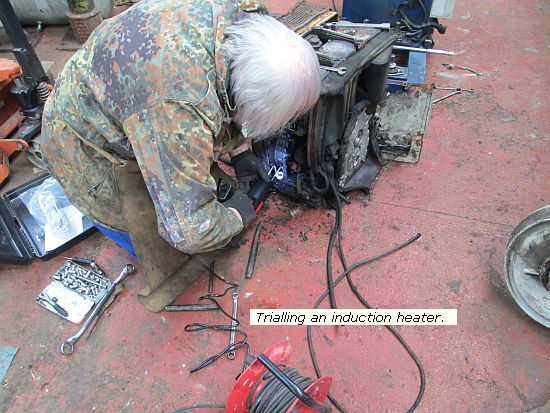
Sadly it didn't work for us - it created heat certainly, the oily crankcase around the nut sizzled and spat: if you want any fried muck, we have it. But for our purposes, this 900W device is too small but did show potential. All was not lost. We lifted the Hatz on the hook of the forklift and I removed the mounting parts from underneath, and discovered that once everything was out the way, these troublesome bolts went into a large hex block and when I cracked the block with a suitable socket and breaker bar, the bolt came out too. So the Hatz was transferred to the mounts of the 'old' Hatz to await developments.
On Friday we said goodbye to the Lister SL2, sold through e-bay to a firm who arranged a time, turned up with a Land Rover pick-up and paid appropriately. In contrast, the winner of our surplus Lombardini didn't seem to read the listing and far from coming to collect started making demands for stringent packing for us to complete before he sent in a carrier of his own choosing. I am not sure yet how this will work out.
Saturday, and Andrew and I were at the shed with something resembling normality. I had the profiles for the throttle arm for RS8's linkage, in fact I had two sets, with the idea of making both of them up, one for the throttle cable and the other to act as an operator for the throttle detection valve. But as I have said before, they reckon the hardest job in engineering is getting a hole in the right place. I mucked up the first one and was quite annoyed with myself, especially as I broke 2 drills doing it! Andrew meanwhile was at work on Ashdown. As part of a reduction exercise, Ashdown is up for sale and before potential purchasers come to view, we need to sort out the traction clutch, which is dragging. The instruction manuals make this out as straightforward, and I daresay with a new box clean on the floor it is. In the end I dropped what I was doing to go and assist, as it needed two of us. For starters it required a large screwed piece, some 10 inches across, to be wound into the housing in order to provide sufficient clearance for it to slide off and up through the gap between the outside of said piece and the loco frame. I suggested making up a tool as to screw it requires gripping into a choice of 4 half-inch holes on the face. Andrew put something together and we screwed said piece to within 5/8 of an inch of the housing, which the instruction manual said was required, but to no avail. There simply isn't the clearance to lift out.
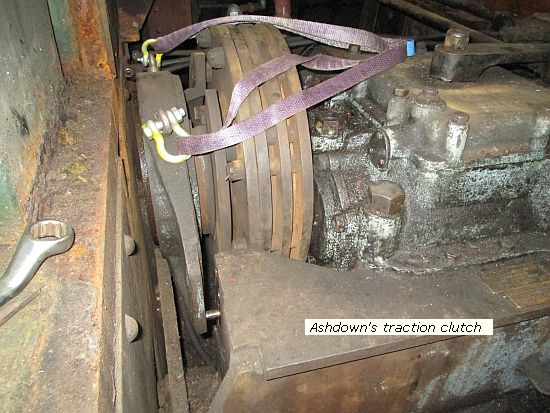
You can see what we're trying to remove from the lifting eyes and sling - the screwed piece is to the left and there is a slot out of sight which ought to faciltate the assembly's removal, but try as we might we were 3-4mm short and screwing the piece in further didn't seem to make any difference. More on this soon.
The Hatz and its associated power pack bits has been lifted onto a pair of stands, giving a much more suitable working height. Both Hatz's both appear to have a common wiring harness through multi-pin plugs, so I'm hoping that although the pin-outs are different, that all will work when I come to power it up. On the side of the battery box is a plastic enclosure with keywitch and warning lights. But one wire - a thick one so probably rather important, had a broken off crimp and was stiff through age, so I opened the watertight box with the intention of renewing it. I was somewhat surprised to find about half-an-inch of rainwater cascading onto my feet. Now, someone has gone to a great deal of trouble using a good quality enclosure and where anything had to be screwed through its wall, liberally applying clear silicon sealant. On the bottom of the box a flexible conduit emerges, curving up and between the battery box and the Hatz. But the end of this flex is open, and I found today, the flex conduit itself is full of water. In fact, what seems to have happened is that rainwater/pressure cleaning has found its way into the flex, and once the level has got high enough, filled the bottom of the box! Before it goes into use I shall drill a couple of drain holes!
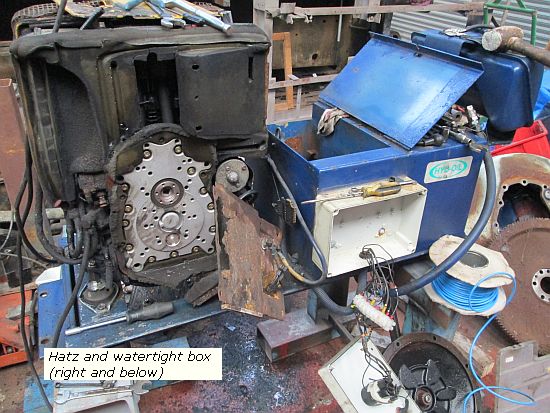
Andrew was off to collect grandson today for half-term, and I woke up with a migraine so didn't head down shed-ward until early afternoon, with the intention of doing light duties and maybe get back to the Hatz. And indeed I did, renewing the damaged cable on the Hatz, reassembling the watertight box (and putting a little nick in the bottom of the flex), remaking the plugged connections and generally getting it ready to test. That and loading the van ready for tomorrow at Tunstead.
At the Peak Rail plc AGM last summer, we were given an hour-long lecture by the Chairman on the failures of the Board to extend the railway over the years, and how our best hope was for the Transport for the North plan to back re-instatement of the Buxton to Rowsley section. Indeed, we were told, even then our new President, Pete Waterman, was attending a meeting on the subject and was patrolling the corridors of power convincing civil servants that it was a good idea. The words may not be exact but that was the gist. We have de-bunked all this in the past, with even Network Rail prefering re-instatement of the LNWR route Ashbourne were it viable, and a recent snippet from within DDDC suggests that the quarry companies may in fact be less than enthusiastic. But a couple of weeks ago the final draft Transport for the North plan was published. And Buxton, and the lines that go to and around it, are not even shown on the accompanying maps.
And that's about it for the week. Andy H won't be joining us tomorrow - the call of the Wild Snowdonia has got the better of him. That's probably not a bad thing as really it is down to me to go through and figure out what I've got wrong where on the electrics and prepare for a start-up hopefully on the 25th. We've a gearbox to fill and fuel to add (and see if those tanks are fuel-tight!) and a host of other minor jobs. Will we be ready? Come back and find out. Until then, see ya.